You’ve been assigned to a group in Canvas. Now what? You visit the Group Homepage, of course! This Canvas feature functions like a group-exclusive mini-course, where you’re able to do some things you can’t do in your actual course, like post announcements and create group discussions.
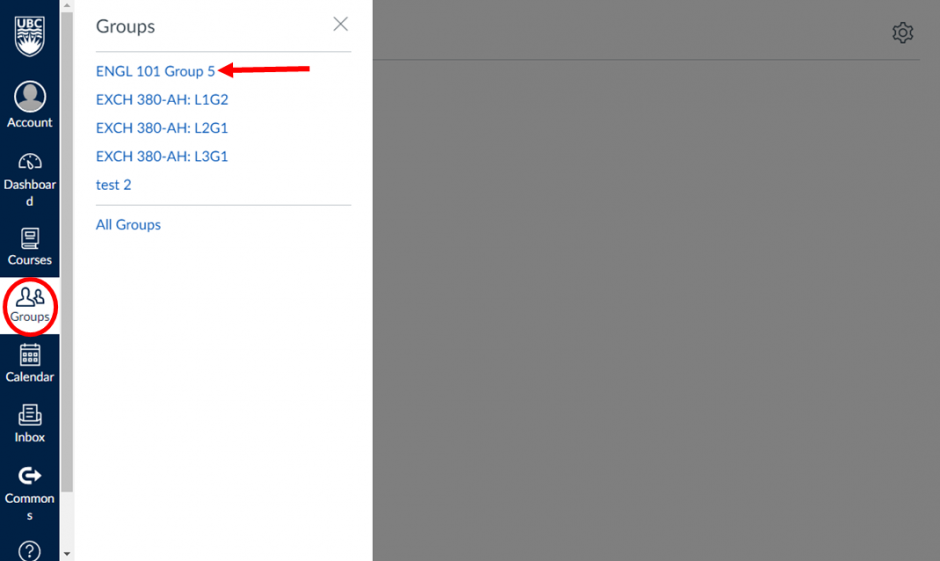
To get started, click the Groups icon on your Global Navigation menu, and select the group you want to visit from the list. If you can’t see the Groups icon, no worries! It simply means that your instructors haven’t assigned you to any Canvas groups yet.
What’s in the Group Menu?
Once you’re in the Group Homepage, you’ll see that it looks like a smaller version of a course, with Announcements, Pages, People, Discussions, and Files, all exclusive to your group. Aside from your group members, only your instructor can access your group’s homepage.
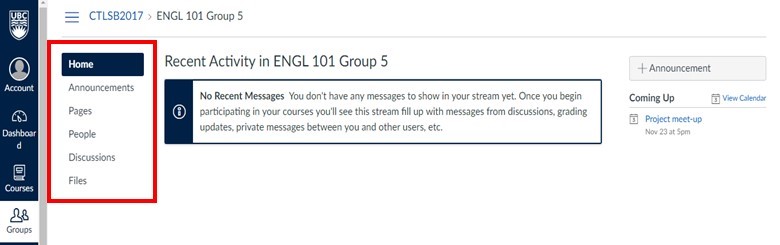
Along the left-hand side of the screen, you can see the following Group features:
- Home, where you can see the recent activity in your group. This is particularly useful when working on a group project, as you can keep track of how it’s progressing and what’s left to do.
- Announcements, where you can post announcements to your group. This would be the place to go to propose a time to meet or to let the rest of your group know about important or unexpected developments in your project.
- Pages, where you can collaborate with your group to create content, embed videos and pictures, and draft group assignments. You can choose to let only group members edit pages or give permission to your instructor to do so as well.
- People, where you can see your group members and your instructor.
- Discussions, where you can post message to your group and get other members’ opinions, even when you don’t see each other in person for a while.
- Files, where you can share files that only your group members and instructor can see.
The Group Calendar
There’s one more important feature in the Group Homepage, and that’s the group Calendar.
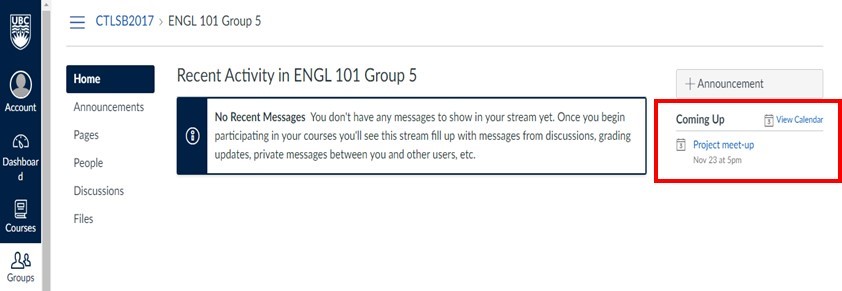
Under “Coming Up” on the right-hand side of the screen, you can see upcoming group events. By clicking “View Calendar,” you can visit the group calendar and create a new event, such as an in-person meeting with your group members.
Final Tips
On the same side of the screen as the calendar, you can post announcements, and, if your instructor has set you as group leader, you can edit your group’s name. If you do, make sure to choose a unique name so that group members won’t get confused with other groups they may be in. (Having the course code in the name is always a good idea!)
Now that you know your way around the Group Homepage, have fun trying things out! See what works for you, and make your groupwork the best it can be.
-Andrea Martinez, UBCO Creative Writing and English Student